RPi5 Home Server — Part 1: Foundation
Part 1 of the RPi5 home server series. From bare metal to a fully containerized Docker stack with a live dashboard and web-based file manager.
From Bare Metal to a Fully Containerized Homelab
This guide walks through the complete process of building a home server on a Raspberry Pi 5 — starting with a blank board and ending with a running Docker stack, a live dashboard, and a web-based file manager. Every step includes not just the how, but the why, so you understand exactly what your server is doing and can troubleshoot it with confidence.
The Raspberry Pi 5 has officially crossed the threshold from a hobbyist tinkerboard to a genuine mini server-grade powerhouse. With 16GB of RAM and a PCIe slot for fast storage, the possibilities are endless.
Our setup uses a Split-Storage Strategy designed for maximum speed and reliability:
- The System — A 256GB NVMe SSD handles the OS, ensuring fast boot times and a snappy interface.
- The Storage — A 2TB NVMe SSD dedicated entirely to the Docker ecosystem and bulk storage.
By redirecting the Docker engine to the 2TB drive, the system drive stays clean while the server scales to host dozens of containers, media libraries, and backups.
Don't have two NVMe drives? No problem. This dual-NVMe setup is the reference build, but the guide works just as well with a single drive or a USB SSD — see Choosing Your Storage Path below. Everything after Part 5 is identical for all setups.
Why a Raspberry Pi 5?
The Pros
- Extreme Power Efficiency — Typical power draw ranges from 3W to 12W. Significantly lower than even "TinyMiniMicro" Intel PCs, making it ideal for a server that never sleeps. At roughly 10W average, a year of 24/7 uptime costs only a few dollars in electricity.
- Massive Memory Headroom — With 16GB of LPDDR4X RAM, you can run dozens of Docker containers simultaneously without the memory bottlenecks that usually plague single-board computers.
- High-Speed Storage — The PCIe interface allows bypassing slow SD cards entirely. With a Dual NVMe HAT, SSD speeds transform the system's responsiveness.
- Silent and Compact — Its footprint is the size of a deck of cards, and with the right cooling it remains virtually silent, allowing it to live anywhere in your home.
The Cons
- ARM64 Architecture — While most popular Docker images (Nginx, Home Assistant, Pi-hole) support ARM, you may occasionally find niche or older software that only provides x86 (Intel/AMD) images.
- No Hardware Video Encoder — The Pi 5 lacks a dedicated hardware encoder. It can play 4K video but isn't the best choice for a Plex or Jellyfin server if you need to transcode video on the fly for remote devices.
- Bandwidth Sharing — The Pi 5 has a single PCIe lane, so a Dual NVMe HAT shares bandwidth between both drives. Great for IOPS, but you won't get full Gen 3 x4 speeds on both drives simultaneously.
Prerequisites
The reference build (what this guide follows):
- Device — Raspberry Pi 5 (16GB RAM recommended; 8GB works for a smaller stack)
- HAT — Dual NVMe PCIe HAT (e.g., Pineberry Pi, Waveshare, or Geekworm)
- OS Drive — 256GB NVMe SSD
- Data Drive — 2TB NVMe SSD (any size works — adjust to your needs)
Everyone needs:
- A spare microSD card (only needed for the initial firmware update)
- Raspberry Pi Imager installed on your primary computer
Throughout this guide, we use the hostname pi-server and the username
admin as examples. Substitute your own choices wherever you see them.
Choosing Your Storage Path
Everything in this guide makes only one assumption: your bulk storage lives
at /mnt/data. How it gets there is up to you.
Path A — Dual NVMe HAT (the reference build)
OS on a small NVMe, data on a large one. Best performance and the cleanest separation — you can rebuild the OS drive without your data ever being touched. Follow the guide exactly as written.
Path B — Single NVMe drive
The OS and data share one large NVMe drive. The most common real-world setup since single-slot NVMe HATs are cheaper and more widely available.
Follow the guide as written, but skip the formatting and mounting steps in Part 5. Instead, just create the data folder on your root filesystem:
sudo mkdir -p /mnt/data
sudo chown $USER:$USER /mnt/dataFrom that point on, the guide is identical — /mnt/data is simply a folder
on your OS drive rather than a separate mount.
Path C — NVMe for the OS + USB 3.0 SSD for data
A solid budget option. Part 5 applies almost unchanged — your USB drive will
appear as /dev/sda instead of /dev/nvme1n1 when you run lsblk. Use a
powered SSD or a quality enclosure — the Pi's USB ports can struggle to power
some drives reliably.
Whatever you choose, don't use a microSD card for Docker or bulk storage. SD cards have low write endurance, and Docker's constant stream of small writes — logs, database files, container layers — will wear one out in months. An SD card is acceptable as a boot drive in a pinch (Path C), but your data and containers belong on real SSD storage.
Part 1 — Modify the Bootloader (NVMe/USB Boot)
By default, the Raspberry Pi 5 looks for a microSD card to boot. We need to update the onboard EEPROM (firmware) to prioritize the PCIe (NVMe) slot.
Why this step exists: The bootloader lives on a small EEPROM chip on the board itself — not on any drive. Out of the box, its boot order checks the SD card slot first. We're flashing a one-time utility image that rewrites that boot order so the Pi will look at the PCIe bus. This only ever needs to be done once per board.
- Launch Raspberry Pi Imager on your PC/Mac.
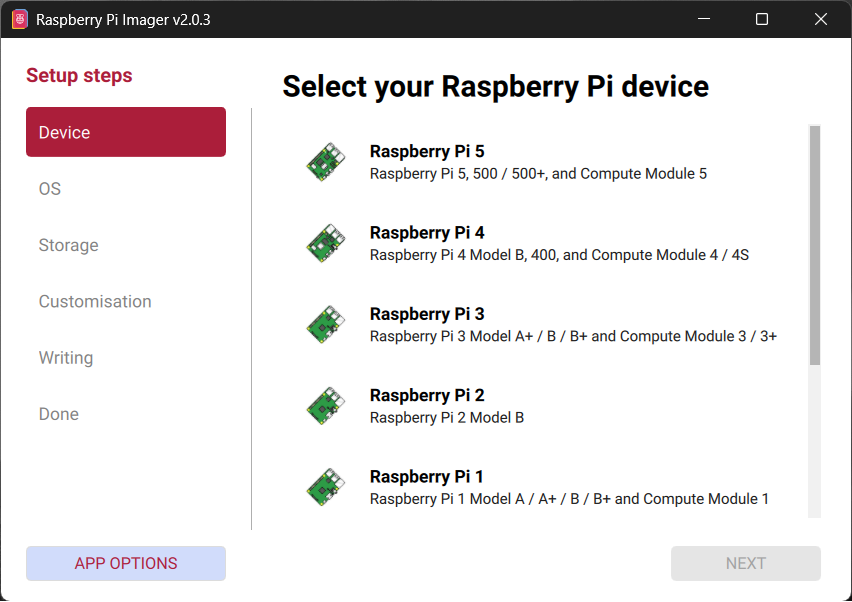
- Click Choose Device and select Raspberry Pi 5.
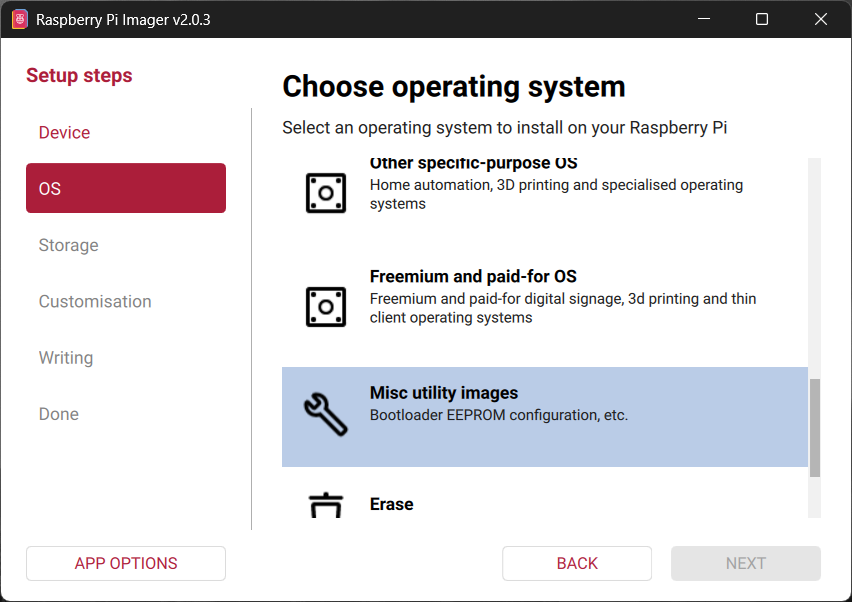
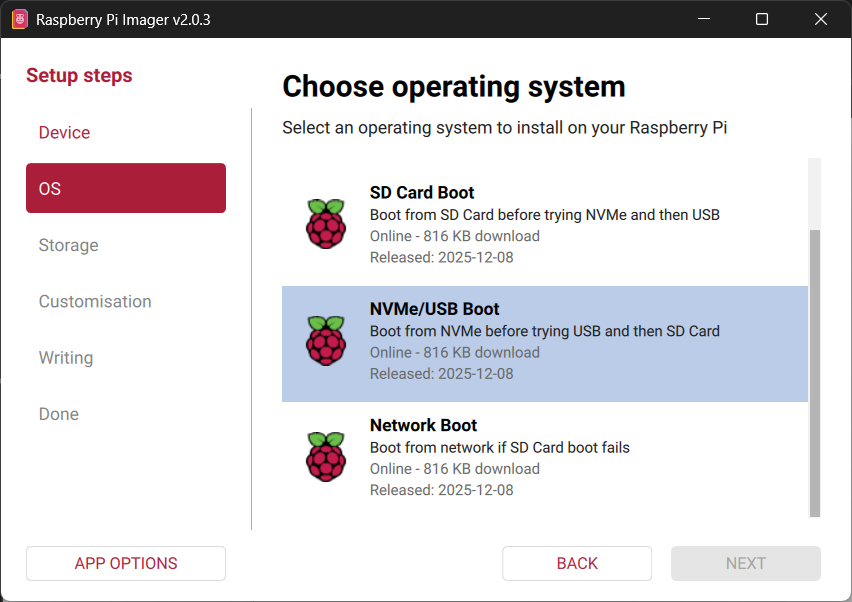
- Click Choose OS and navigate to Misc Utility Images → Bootloader (Pi 5 family) → NVMe/USB Boot.
- Insert your spare microSD card and select it under Choose Storage.
- Click Next and then Yes to write the image.
- Once the write is finished:
- Insert the microSD card into the Raspberry Pi 5
- Connect power
- Wait for the green ACT LED to blink in a steady, rapid pattern (or for the screen to turn green if a monitor is attached)
- Power down the Pi and remove the microSD card.
The Pi is now NVMe-ready. It will attempt to boot from the PCIe bus if no SD card is present.
Part 2 — Install Raspberry Pi OS Lite (64-bit)
Now that the bootloader is ready, flash the operating system onto your OS drive — the 256GB NVMe in the reference build, or whatever drive your chosen storage path uses as the system disk.
Why Lite? A headless server has no monitor, so a desktop environment would only waste RAM and CPU cycles. Pi OS Lite boots straight to a terminal, leaving every possible megabyte free for containers.
- Connect the 256GB NVMe drive to your computer via a USB-to-NVMe adapter or enclosure.
- Open Raspberry Pi Imager.
- Click Choose Device and select Raspberry Pi 5.
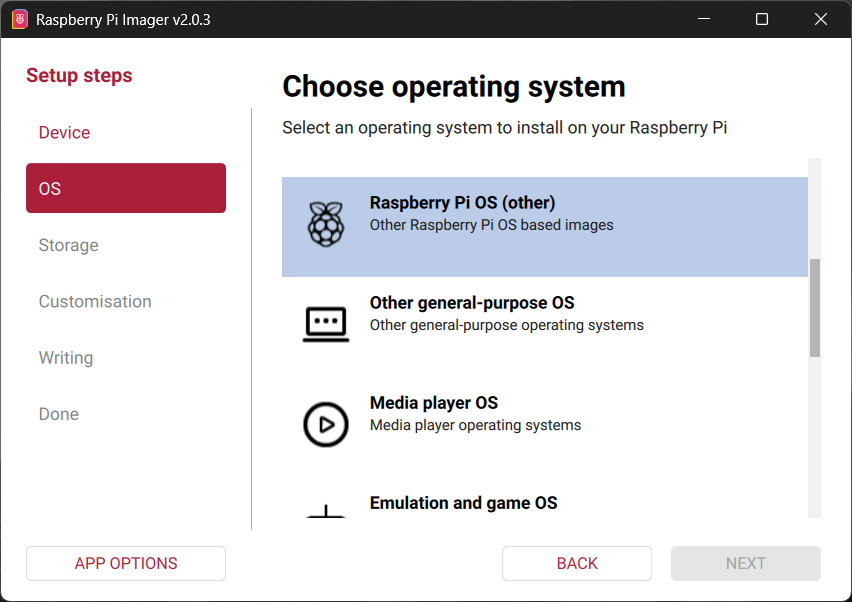
- Click Choose OS and navigate to Raspberry Pi OS (other) → Raspberry Pi OS Lite (64-bit).
- Click Choose Storage and select the 256GB NVMe drive.
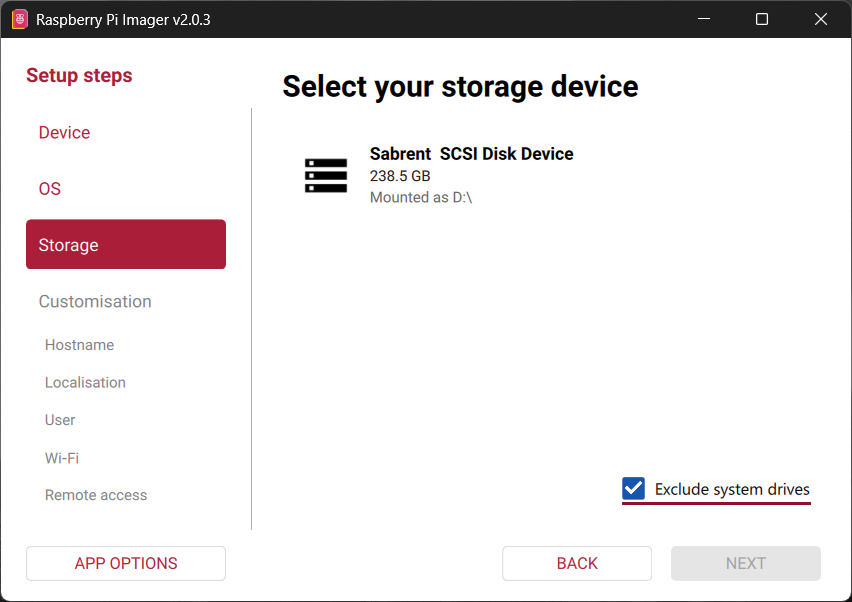
- After clicking Next, select Edit Settings to apply OS customization.
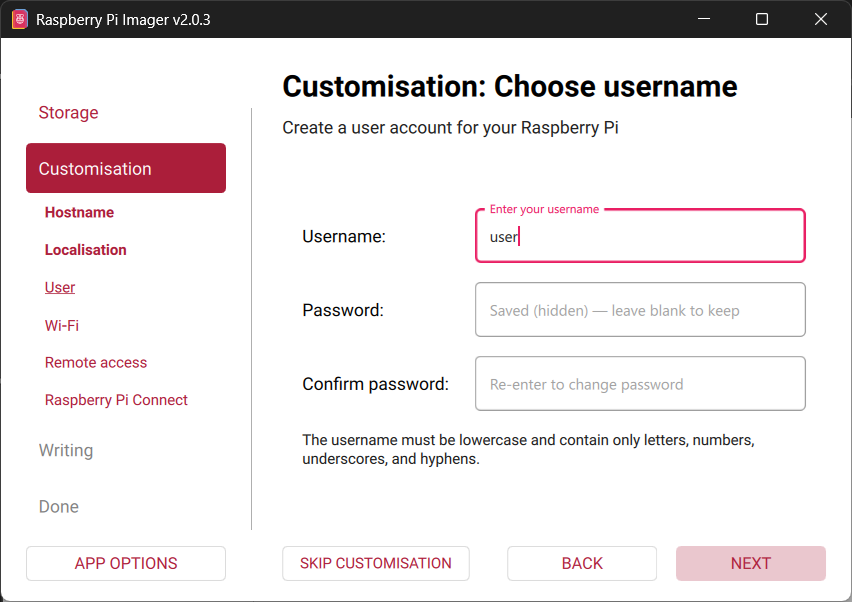
- In the General tab:
- Hostname:
pi-server - Username:
admin(or your preferred username) - Password: your secure password
- Hostname:
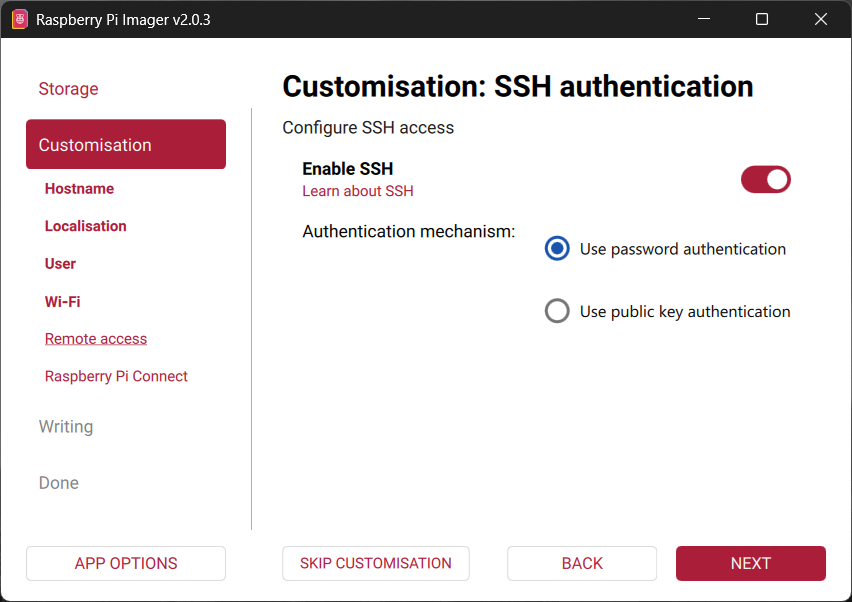
- In the Services tab, enable SSH and select Use password authentication.
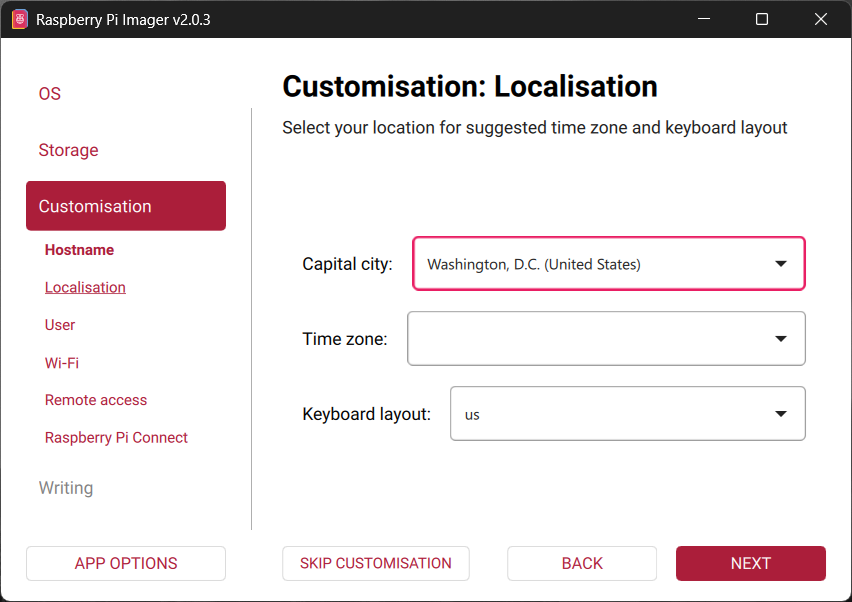
- In the Localisation tab, set your timezone and keyboard layout.
- Click Save, then Yes to apply the settings, and Yes to write the image.
- Once complete, safely eject the drive and install it into your Pi — the primary slot of your NVMe HAT.
By baking the hostname, user, and SSH service into the image, the Pi comes online ready to accept remote connections on first boot — no keyboard or monitor ever required.
Part 3 — Initial Boot and Connection
- Power on the Pi and connect it to your network via Ethernet.
- Give it about a minute to perform the initial file system expansion and reboot.
- From your computer, open a terminal and connect via SSH:
ssh admin@<your-pi-ip>If you don't know the Pi's IP, check your router's client list, or try
mDNS hostname resolution: ssh admin@pi-server.local — this works on most
home networks.
- Enter the password you set earlier. The first time you connect, SSH will
ask you to confirm the server's fingerprint — type
yes.
Part 4 — PCIe Performance Tuning
By default, the PCIe port runs at Gen 2 speeds. We'll force it to Gen 3 to ensure the NVMe drives aren't being artificially throttled.
The numbers: PCIe Gen 2 x1 tops out around 500 MB/s. Gen 3 x1 doubles that to roughly 985 MB/s. The Pi 5 ships at Gen 2 because Gen 3 is technically out-of-spec for the board, but in practice it is stable on the vast majority of setups — and it's a free performance doubling.
- Open the system boot configuration file:
sudo nano /boot/firmware/config.txt- Scroll to the very bottom and add:
# Force PCIe Gen 3 speeds
dtparam=pciex1_gen=3
# Ensure the NVMe interface is initialized
dtparam=nvme-
Save and exit: press Ctrl+O, then Enter to save. Press Ctrl+X to exit.
-
Reboot to apply the changes:
sudo reboot- Verify the change (optional):
journalctl -b | grep -E "PCIe|nvme"Look for logs showing 8.0 GT/s (Gen 3). If you see 5.0 GT/s,
double-check config.txt for typos.
If you experience instability — random NVMe errors in the logs or drives
disappearing — remove the dtparam=pciex1_gen=3 line and reboot to fall
back to the fully in-spec Gen 2 speed.
Part 5 — Format and Mount the Data Drive (Paths A and C)
Path B (single drive)? Skip this entire part. Just create the data folder
and jump to Part 6: sudo mkdir -p /mnt/data && sudo chown $USER:$USER /mnt/data
- Identify the data drive:
lsblkOn a dual-NVMe HAT (Path A), the data drive is usually nvme1n1. On a USB
SSD (Path C), it will appear as sda. Make absolutely sure you distinguish
it from your boot drive (nvme0n1) — the next step is destructive. The size
column in lsblk is your best sanity check.
- Format the drive as ext4:
This permanently erases everything on the target drive. Triple-check the device name before running this command.
sudo mkfs.ext4 /dev/nvme1n1- Create the mount point:
sudo mkdir -p /mnt/data
sudo chown admin:admin /mnt/data- Get the drive UUID:
sudo blkid /dev/nvme1n1Copy the string inside the UUID="..." quotes.
- Configure persistent mounting:
sudo nano /etc/fstabAdd this line at the bottom, replacing YOUR-UUID-HERE with the UUID you
copied:
UUID=YOUR-UUID-HERE /mnt/data ext4 defaults,noatime 0 2-
Save and exit: Ctrl+O, Enter, Ctrl+X.
-
Mount the drive and verify:
sudo mount -a
df -h /mnt/datasudo mount -a mounts everything in fstab right now — which also acts
as a syntax check. If this command errors, fix fstab before rebooting.
A broken fstab can prevent the Pi from booting cleanly.
Part 6 — Install Docker and Docker Compose
- Run the installation script:
curl -fsSL https://get.docker.com -o get-docker.sh
sh get-docker.sh- Add your user to the Docker group:
sudo usermod -aG docker admin- Apply group changes:
newgrp docker- Verify the installation:
docker version
docker run hello-worldPart 7 — Point Docker's Storage at the Data Drive
- Create the target folder:
mkdir -p /mnt/data/docker- Edit the Docker daemon config:
sudo nano /etc/docker/daemon.json- Set the data root:
{
  "data-root": "/mnt/data/docker"
}- Restart the service:
sudo systemctl restart docker- Verify:
docker info | grep "Docker Root Dir"It should report /mnt/data/docker.
Part 8 — The Organized Directory Structure
/mnt/data/
+-- docker/                 < Docker system files (never touch manually)
+-- docker-compose/         < Your config home
|   +-- docker-compose.yml  < Single yaml for all containers
|   +-- appdata/            < Container config directories
+-- storage/                < Your bulk storage
    +-- media/
    +-- backups/
+-- documents/Create the skeleton:
mkdir -p /mnt/data/docker-compose/appdata
mkdir -p /mnt/data/storage/{media,backups,documents}Part 9 — Installing Homepage (Your Server Dashboard)
1. Create the config directory
mkdir -p /mnt/data/docker-compose/appdata/homepage2. Create the Docker Compose file
nano /mnt/data/docker-compose/docker-compose.ymlAdd the following:
services:
  homepage:
    image: ghcr.io/gethomepage/homepage:latest
    container_name: homepage
    restart: unless-stopped
    ports:
      - "3000:3000"
    volumes:
      - ./appdata/homepage:/app/config
      - /var/run/docker.sock:/var/run/docker.sock:ro
    environment:
      - PUID=1000
      - PGID=1000
      - TZ=Etc/UTC
      - HOMEPAGE_ALLOWED_HOSTS=192.168.1.150:3000,localhost:3000

networks:
  default:
name: home_server_net3. Launch the container
cd /mnt/data/docker-compose
docker compose up -d4. Access the dashboard
Open your browser and go to http://192.168.1.150:3000
Homepage is configured using YAML files in
/mnt/data/docker-compose/appdata/homepage. Edit services.yaml,
widgets.yaml, and settings.yaml to customize your dashboard.
Homepage hot-reloads changes — no container restart needed.
Part 10 — Installing Filebrowser
1. Prepare the database
mkdir -p /mnt/data/docker-compose/appdata/filebrowser
touch /mnt/data/docker-compose/appdata/filebrowser/filebrowser.db
sudo chown -R 1000:1000 /mnt/data/docker-compose/appdata/filebrowser2. Add to Docker Compose
  filebrowser:
    image: filebrowser/filebrowser:latest
    container_name: filebrowser
    restart: unless-stopped
    user: 1000:1000
    ports:
      - "8080:80"
    volumes:
      - /mnt/data/storage:/srv
      - ./appdata/filebrowser/filebrowser.db:/database/filebrowser.db
    environment:
      - PUID=1000
- PGID=10003. Launch and log in
cd /mnt/data/docker-compose
docker compose up -dAccess Filebrowser at http://192.168.1.150:8080
Default credentials: admin / admin
Change your password immediately after first login. Go to Settings → User Management to update your credentials.
Conclusion
Your Raspberry Pi 5 is now a functional home server with a live dashboard and web-based file manager. The foundation is in place — every subsequent part of this series builds on what we've set up here.
Troubleshooting
"Permission Denied" when creating folders
sudo chown -R $USER:$USER /mnt/data"YAML: did not find expected key"
Never use tabs in YAML — only spaces. Check indentation carefully.
Filebrowser "Wrong Credentials" on first login
Check the logs for a randomly generated password:
docker compose logs filebrowserHomepage shows "Access Denied"
Ensure HOMEPAGE_ALLOWED_HOSTS in your docker-compose.yml includes your
Pi's IP address.
Data drive isn't showing up after reboot
Re-check /etc/fstab and confirm the UUID matches sudo blkid output.
"bind: address already in use"
Check what's using the port with docker ps, then change the left-hand
number in the ports: mapping.
NVMe filesystem went read-only
See the dedicated guide: RPi5 NVMe Emergency: Filesystem Gone Read-Only
The golden rule of Docker: if a container is behaving strangely, check
the logs first. docker compose logs -f [service_name] shows exactly
what the application is complaining about in real time.